Showing posts with label Related items list. Show all posts

Monday, May 23, 2016

Creating related items on a new item form via a non-grid related items control

In November we released a feature that allows you to create new items and link them to the current item on a new item form. Up until now, however, you could only do that with the related items control in grid mode. Starting from Forms Designer 3.0.8 you are able to do it with a non-grid mode related items control as well.

Let’s illustrate what we’re talking about. Here’s a form:

New SharePoint form with related items

Let’s add a new related contact:

Adding a related item from a new SharePoint form

It appears in the related items control:

New SharePoint form with an attached item

Then we can save the parent item, when we do so a link is created:

Linking related items to a SharePoint item after saving

Implementation

Open the parent New form in Forms Designer.

Set the related items control to 'Show new items only':

Show new related items only

Add the following line of code to the JS-editor:

fd.populateFieldsInGrid($('.related-items'), {
 RelatedIssue: '{CurrentItem}'
});

Where RelatedIssue is the internal name of a lookup field on the child list to the parent list and related-items is a CSS class name that you need to assign to the related items control in Forms Designer.

Save.

Open child New form in Forms Designer.

Add an HTML control to the form, set CDATA to false, insert the following code to it:

<div id="_fd_parent_temp">
<asp:HiddenField runat="server" ID="_fd_parent_tempField"
__designer:bind="{ddwrt:DataBind('i','_fd_parent_tempField','Value','Load','ID',ddwrt:EscapeDelims(string(@ID)),'@_fd_parent_temp')}" />
</div>
Setting temporary parent ID in a child new form

Add the following code to the JS editor:

$('#_fd_parent_temp > input').val(window.top.fd._tempParentId());

Save the child form.

Explanation

When we added a related items control and saved the form, Forms Designer added a hidden field called '_fd_parent_temp' to the target list. We then added a hidden '_fd_parent_tempField' control to the child form and bound it to the hidden field. When the child form loads, the JavaScript sets a temporary id of the parent item into _fd_parent_tempField. Finally, when the parent item is saved, Forms Designer checks '_fd_parent_temp' for the parent items’ id and sets the 'RelatedIssue' field to the parent item.

Feel free to ask your questions

Friday, November 13, 2015

Dynamic filtering of the Related Items list on a SharePoint form

Quite frequently our customers ask us how they can dynamically filter their related items lists based on a value entered into a field on a form created in Forms Designer. In this post I will describe how you can do that with a lookup, a drop-down choice and a people picker field. Although I will use these three field types, just about any field type will do for the job.

The steps for implementing this functionality are pretty straight-forward:

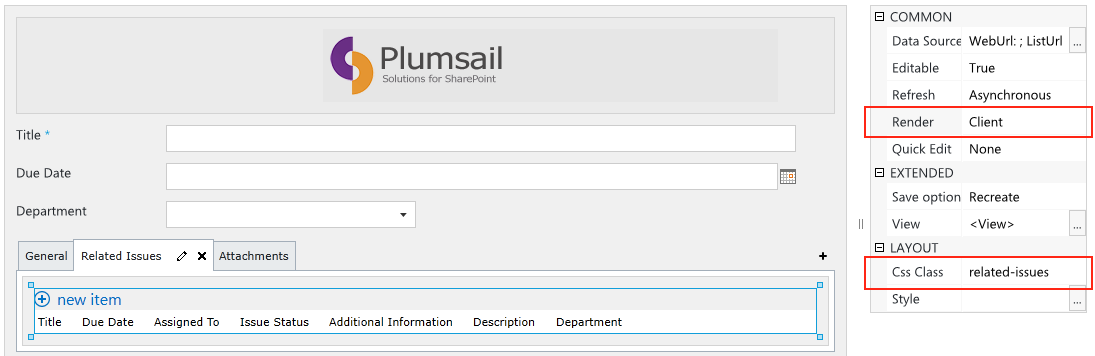
  1. Set your related items controls render mode to Client (see screenshot below).
  2. Add a CSS class name to it (see screenshot below). In following samples I will use the “related-issues” class name, if you use something different then replace “related issues” in the code with your class name.
  3. Add the appropriate code to the JS-editor. See code samples below.
Related Items in the client rendering mode

Lookup field

Say we have an issue form with a lookup to a department list and a related items list of other issues. These related issues need to be dynamically filtered based on the value in the Department field. The form will look something like this:

Filtering the related items by a lookup field

When we change the department, the list is refreshed straight away:

Filtering the related items by a lookup field

So, how do we achieve this?

After you have followed through the steps described in the previous section paste the following code into the JavaScript editor of your form:

//first filter on page load
setHash();

//and attach an on-change handler that will call the filtering function wherever the value of the field changes
fd.field('Department').change(setHash);

//this is the actual function that filters the list
function setHash(){
 //get value
 var value =  fd.field('Department').control('getSelectedText');
 if (value == "(None)") {
  value = "";
 }

 value =  encodeURIComponent(escape(value)).replace(/\-/g, "%252D");

 //set the URL’s hash value. An explanation on this is at the end of the article.
 window.location.hash = "InplviewHash" + $(".related-issues [webpartid]").attr("webpartid") + '=FilterField=Department-FilterValue=' + value;
}

In this code you will need to replace “Department” with the Internal Name (or Internal Names) of the field you’d like to filter:

  • Where it says fd.field('Department'), Department is the Internal Name of the lookup field that we get our value from.
  • Where it says FilterField=Department Department is the Internal Name of the field in the target list that is being sorted.

In our case the two Internal Names are the same, but they don’t have to be.

And this is it, now our related issues are auto filtered based on the selected Department whenever user changes the value of the Department field.

Dropdown choice field

Here we will do exactly the same thing, but using the Issue Status field, which is a single-value drop-down choice field.

Filtering the related items by a drop-down field

This is the code:

setHash();

fd.field('Issue_x0020_Status').change(setHash);

function setHash(){
 var value =  encodeURIComponent(escape(fd.field('Issue_x0020_Status').value())).replace(/\-/g, "%252D");
 window.location.hash = "InplviewHash" + $(".related-issues [webpartid]").attr("webpartid") + '=FilterField=Issue_x0020_Status-FilterValue=' + value;
}

Here you will need to replace “Issue_x0020_Status” with the appropriate Internal Name(s), for details on this see the Lookup field section above.

Single-value Client-mode people picker field

In this case we want to filter our issues based on the Assigned To field:

Filtering the related items by a user field

This is our code:

setHash();

fd.field('Assigned_x0020_To').change(setHash);

function setHash(){
 var value = "";

 //if the people picker field really has a value, get it
   if (fd.field('Assigned_x0020_To').value() && fd.field('Assigned_x0020_To').value()[0] && fd.field('Assigned_x0020_To').value()[0].DisplayText){
  var value =  encodeURIComponent(escape(fd.field('Assigned_x0020_To').value()[0].DisplayText)).replace(/\-/g, "%252D");
 }

 window.location.hash = "InplviewHash" + $(".related-issues [webpartid]").attr("webpartid") + '=FilterField=Assigned_x0020_To-FilterValue=' + value;
}

As with the previous field types you’ll need to swap “Assigned_x0020_To” for the appropriate Internal Name value(s), see the Lookup section for more detail.

Other fields

You can utilize this feature with pretty much any type of field, but you need to know how to retrieve the value of the field. For a list of field types and corresponding ways to retrieve their values check this page: http://formsdesigner.blogspot.com/2013/04/getting-and-setting-sharepoint-form.html.

Explanation

To make this work we are utilizing the SharePoint URL hash feature that is used with SharePoint 2013 views in the client-side rendering mode.

Have a look at this sample URL:
https://mywebsite.com/Lists/Issue/fd_Item_EditForm.aspx?ID=20#InplviewHash3f6a312c-cd80-4e64-be27-075b976ced40=-FilterField1=Parent-FilterValue1=20-FilterField2=Issue_x0020_Status-FilterValue2=In Progress

What our code samples do is set the “InplViewHash” part of the URL together with its FilterField and FilterValue values, which is what tells the related items control to sort the list. Simple as that.

Thursday, November 5, 2015

Add related items on a new SharePoint form

We are glad to introduce you our new feature that has become available in SharePoint Forms Designer 3.0.5: the ability to create related items inline and link them to the current item automatically, including when you are on the new item form. You may want to read our post about related items auto-fill here before you proceed.

You may have a related items control on your new item form:

Add related items on a new SharePoint form

And you may want to add an item that is related to the current item. In that case you fill out a field, say Title, and click away or press Enter. The entity is created and with default fields filled out automatically.

New SharePoint form with related items.

Then you click Save and a link between the two items is created. Below is the same item opened in display view after saving. As you can see, the related issue is present:

Edit SharePoint form with related items in the quick edit mode

So, how to set this up? First of all, this feature will only work if:

  • You run SharePoint 2013 On-Premises or SharePoint Online.
  • You run Forms Designer version 3.0.5. In order to update Forms Designer in SharePoint Online simply remove the currently installed version and install the new version from the store.
  • The primary list and the related list are located on the same site.

If everything of the above is true, then let’s go through the setup process.

  1. In Forms Designer drop the related items control and set it’s Quick Edit option to “Only”:
    Related Items in quick edit mode on a SharePoint form
  2. Set up the Data Source as you would do normally
  3. Open up the JavaScript editor and paste something like the following:
    fd.populateFieldsInGrid($('.related-items'), {
     Parent: '{CurrentItem}',
     Assigned_x0020_To: _spPageContextInfo.userId,
     Due_x0020_Date: '12/12/2020',
     Description: 'Related Issue',
     Issue_x0020_Status: 'In Progress',
     Additional_x0020_information: 'This is a supervised issue.',
    });


    Draw attention to Parent: '{CurrentItem}'. Parent is a lookup field to the current list, which is being used as the filter by value in the related items control. It can be displayed in the control, but it doesn’t have to. {CurrentItem} is the new token that specifies the current item, using this token allows you to link related items to the current item even when it has not yet been created.

    I won’t discuss the function fd.populateFieldsInGrid and its syntax further here, please see the aforementioned blog post about it if required.

  4. Add ‘related-items’ CSS Class to the related items control. This class is used in fd.populateFieldsInGrid function to identify the related items control.

    That’s it, now the Parent field of inline-created related items will be set to the current item when the item is saved.

Friday, September 18, 2015

Inline spreadsheet-style edit mode for the Related Items control on a SharePoint form

Forms Designer has just gotten a new feature: the related items control is now able to do inline spreadsheet-style quick editing. This feature is supported in SharePoint 2013 and SharePoint Online in Office 365. It looks like this:

Edit related items in Quick Edit mode directly from the parent SharePoint form

This mode is available when the render mode of the control is set to ‘Client’. When it is, the ‘Quick Edit’ mode cell in the properties window is enabled, and you can select ‘True’ to enable the mode on the control.

Set Quick Edit property to True

The JavaScript framework has also received a function to auto-fill empty cells in this mode. The name of the function is populateFieldsInGrid, let’s take a look at how it can be used.

In the screenshot we add a new record and only fill in its title:

Adding a SharePoint item in Quick Edit mode from its parent form.

And then we click somewhere outside the row or press Enter, and the record gets saved with some default values that we specified in our JavaScript function:

Auto-populating columns of related items in Quick Edit mode.

The related items control is set to filter items that are only related to the current issue, so what we want to do is set the parent of the new related issue to the current issue, and do it implicitly, behind the scenes.

Filtering related items by the parent field

The way to accomplish this auto-filling functionality is to add a snippet of code to the JavaScript editor and add a CSS class name to the related items control (please note that fields you’re trying to fill in with this function don’t have to be present on the form, like ParentIssue isn’t present on the form but is still filled in by our code).

This is our code:

fd.populateFieldsInGrid($('.related-items'), {
 Due_x0020_Date: '12/12/2020',
 Assigned_x0020_To: _spPageContextInfo.userId,
 Description: 'Related Issue',
 Priority: 'Normal (2)',
 Additional_x0020_Information: 'This is a supervised issue.',
 ParentIssue: GetUrlKeyValue('ID'),
});

And we’ve also added ‘related-items’ CSS Class name to our Related Items control (in the properties window of Forms Designer).

In populateFieldsInGrid function above we specify:

  1. A jQuery selector that contains the Related Items control. You can specify an arbitrary CSS class name in the properties and build the selector based on this class as we did in our sample.
  2. A bunch of fields and their default values. (Note that the field names must be correct InternalNames, found under ‘InternalName’ in the properties window).
    • Due_x0020_Date: a date field. Use the date format that is set on your SharePoint installation (the same format you use when you enter your dates manually).
    • Assigned_x0020_To: a single user field. You can either set the value of such field by id of the user, or by his display name (in this case the format must be '-1;#DisplayName'), or by his email (same format '-1;#EmailAddress'). Note the -1’s here are literally -1’s, not some example ids.
    • Description: a text field. Simply specify the text you wish to enter here.
    • Priority: a single lookup field representing text. Specify textual value of the desired entry.
    • Additional_x0020_Information: a multi check box. Enter exact textual values of yours choices, separated by a semicolon and a space.
    • ParentIssue: a single lookup field to the ID field. Specify the ID value. In our example we use GetUrlKeyValue('ID') function to get the ID of the current element.

Friday, January 9, 2015

Filter related items by almost any field of SharePoint form

In this article I'd like to introduce you to a new feature of SharePoint Forms Designer 2.9.1 allowing to filter the Related items control by almost any form field including lookup, single line of text, number, choice, date, user, and even calculated column. First, I want to demonstrate the most common case, filtering by a lookup column.

Filtering by Lookup column

I've created a list of projects and a related list of issues. The Issues list contains a lookup column to the Projects list. Now I will show how to create a form for the Projects list with the list of related issues in it. We need to put the Related items control onto the project form and configure its data source following way:

Filter related items by lookup column on SharePoint form

Project column of the source list is a lookup to the Projects list. Here is the result:

Filter related items by lookup column on SharePoint form

As you might noticed I've configured filtering by a display column of the lookup column. But if you say have multiple projects with the same title you will see issues of all such projects in the same form. To avoid this you should add ID of the parent list as an additional column in the lookup settings:

Additional lookup field

Now you can filter the related issues by ID of the parent item in the Data Source Editor:

Filter related items by lookup ID column on SharePoint form

Filtering by Date column

Ok, now let's configure filtering by a date column. I've created Daily Reports list to store forms with the list of solved issues filtered by a date specified in the report. As previously, we need to place the Related items control onto the form in Forms Designer and configure its data source following way:

Filter related items by date column on SharePoint form

DateCompleted is a field of the Issues list containing resolution date of an issue. Here is the result:

Filter related items by date column on SharePoint form

Filtering by User column

And finally, I'd like to demonstrate how to filter the Related items control by a people picker field. For this case I've created User Reports list containing a people picker field. Next, we need to design a form with the Related items control linked to the Issues list and filtered by the people picker column:

Filter related items by user column on SharePoint form

Almost done. But in contrast to the previous cases we have to do additional stuff here because SharePoint returns people picker value as a link. So we need to extract plain username from the link and pass it outside the form to filter the related items properly. Put HTML-control onto your form, switch CDATA property to False and insert the following code into Content property:

<xsl:variable name="UserName" select="substring-after(substring-before(substring-after(@User,'userdisp.aspx?ID='),'&lt;'),'&gt;')"/>
<xsl:comment>
<xsl:value-of select="ddwrt:GenFireConnection(concat('*', '@User=', ddwrt:ConnEncode(string($UserName))), '')" />
</xsl:comment>

Please, pay attention that to make this sample working you have to replace the highlighted attributes with the internal name of your people picker field (Form field). Here is the report:

Filter related items by user column on SharePoint form

Summary

In this article I demonstrated how to filter related items by almost any field of the parent form. Please, note that if you need to filter related items by multiple columns, you can concatenate them into a single calculated field and configure filtering by this column. Feel free to ask your questions in the comments.

Tuesday, April 1, 2014

Related documents with support of quick upload

In this article, I would like to demonstrate how to design a form with related documents and how to link new documents easily by dragging and dropping them onto the form. To build this solution I will use Forms Designer 2.8.8 which contains a new JavaScript function for auto filling metadata of the uploaded documents.

For my "proof of concept" I will use SharePoint calendar and a simple document library, but the instructions below work for any types of list and related library, e.g. issues and wiki pages, employees and job descriptions etc.

First, I created a Calendar and a Document library, added a lookup field into the document library and connected it with the calendar. Next, I ran Forms Designer from the calendar and designed the Edit form:

SharePoint event form with related documents

I distributed the standard event fields on the first tab and put a Related items control onto the second one. I set Render property into 'Client' to make list refresh automatically when the user drops a document on it. Here is the Data source configuration of the Related items control:

Data source of the related items control

As you can see, I selected my documents library as the data source and filtered it by the lookup column. Well, after that I could drop documents onto this area but the lookup column did not fill automatically and new documents disappeared from the view after uploading. And here I used a new JavaScript function, which had been implemented in Forms Designer 2.8.8:

fd.updateDroppedDocuments(container, fieldValues)

container is a jQuery selector of Related items container which may contains one or more Related items controls.

fieldValues is an object containing the default values of fields. Example:

{
    Lookup: GetUrlKeyValue('ID'),
    Status: 'Closed'
}
Note: the field names of the object have to match the internal names of the related library.

First, I assigned a CSS-class called 'related-docs' to my related documents.

Assign CSS-class to the related items control

Next, I put the following code into JS-editor:

fd.updateDroppedDocuments('.related-docs', {
    Event: GetUrlKeyValue('ID')
});

As you can see, I built the jQuery selector based on the assigned CSS-class and set the current event ID as the default value of the lookup field whose internal name is Event.

Ok, now, when the user drops a document onto the second tab, the lookup field is automatically filled with the currently opened event and uploaded documents appear immediately in the related documents section:

Drop documents onto the parent form

Here is the result:

Default value of the uploaded document

Please, note that with help of fd.updateDroppedDocuments function you can pre-fill not only a lookup field but any other fields. As the default values you can use field values from the parent form, constants, query parameters and other values retrievable in JavaScript.

As usual, I will be glad to answer your questions in the comments.

Wednesday, October 2, 2013

How to open edit form right after creation of an item in SharePoint

In this article I would like to demonstrate how to open an edit form of an item right after its creation. This feature is very useful if you have related items filtered by the currently selected item on the form. As you may have noticed, you cannot edit related items on a new form because the parent item has not been created and its ID is not defined yet, so, other list items or documents cannot be linked to it.

Due to this issue, to create an item with connected child items users have to create a parent item first, save it and find it in the list, open its edit form and start editing the related items. Quite difficult, isn't it?

In SharePoint Forms Designer 2.7.11 we have implemented functionality that helps you to redirect users to any URL including edit form of an item right after its creation and inject ID of the currently created item into the link address.

Please note: this functionality works only in forms opened in full page, not in dialogs. In SharePoint 2013 all forms are opened in full page by default but in SharePoint 2010 you have to change this option in the following way: List Settings → Advanced Settings → Launch forms in a dialog. Set this option in 'No'.

Now, navigate to the list where you wish to configure redirection, open Forms Designer and choose a new form. Add the following JavaScript into JS-editor:

fd.onsubmit(function() {
  var uri = fd.setUrlParam(decodeURIComponent(window.location.href), 'FDRedirectWithID', 'fd_Item_Edit.aspx?ID=');
  fd.sourceFormParam(uri);
  return true;
});
As you can see, I used new JavaScript functions here:

setUrlParam(url, key, value)
Adds or updates query parameter in provided URL with a specified value and returns a new URL.
Url - source URL-string
Key - name of query string parameter
Value - new value of query parameter

sourceFormParam(value)
Gets or sets 'Source' query parameter of the URL which is contained in action attribute of the form. Source parameter contains URL of the page where users will be redirected after the submission of the form. If value is not specified the function returns the current value of 'Source' parameter.

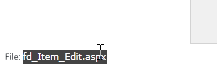
In my example, users will be redirected after submission to the same page but with additional query parameter 'FDRedirectWithID'. If this query parameter is not empty Forms Designer gets its value, appends ID of the last item created by the current user and redirects to the generated URL. In my case, users will be redirected to 'fd_Item_Edit.aspx' form. You have to replace the name of the form with your own value. You can find it at the left bottom corner of Forms Designer.

SharePoint form name

If you have any questions, please, leave them here. Thank you.

Thursday, August 29, 2013

How to create forms with related items in SharePoint 2010/2013 including Office 365

In this article I am going to demonstrate a new control of SharePoint Forms Designer called Related Items which has become available in version 2.7.5.

In the previous entries (1, 2) I described how to create forms with related items but that method requires much configuration including modification via SharePoint Designer. So users have to possess base skills in SharePoint configuration to follow instructions from those articles.

We looked into our customers requests and added a new control that allows to add and configure a list of related items directly in Forms Designer without using SharePoint Designer or configuration of web parts.

First, I have created lists linked by a single lookup column. Here you can use the standard lookup or our Cross-site Lookup column. Related items control works with both of them. Here are my lists:

  • Countries;
  • Offices: contains Country lookup column linked with Countries list;
  • Issues: contains Country and Office lookup columns linked with Countries and Offices lists accordingly;

In the Issues forms I configured cascading between Country and Office drop-downs. So, users can create issues and attach them to the specific office by selecting Country first and then Office.

Now I would like to place the list of Offices into Country form and filter it by the current Country. Also, it would be very useful to edit Offices list directly from the Country form.

Open Countries edit form in Forms Designer. You can find the new control 'Related Items' on the left side. I put it into the accordion section:

Related Items Control in SharePoint Forms Designer

In the properties window you can find Data Source property. Expand it by clicking the dots button. Here you can specify the list that you wish to display in your form, its view and lookup column for filtering. To display offices related to the current country I setup the following configuration:

Data Source Editor of Related Items control

Next, I will describe other properties of Related Items control.

Editable
If value is True, the related list is displayed with Add new button and a context menu for the items. So you can modify the list directly from the current form. It is good practice to set this property False for display forms and True for edit forms.

Save option If value is Recreate, the web part with the related items is resaved each time the form is saved. So if you wish to modify Related items with SharePoint Designer, you can change the value of Save option property to IgnoreIfExists, and Forms Designer will not resave Related Items component in the case it already exists on the form page even if you modified its properties.

View This is an extended property for advanced users. Here you can modify schema of related items view.

Ok, now let's see what we get:

SharePoint form with related items

Now, users can edit Offices directly in Country form. When the user clicks 'new item' they see Office form which contains Country lookup column:

SharePoint new form

Ok, now I wish to fill Country field in the new Office form automatically based on the parent form. Open this form in Forms Designer and configure its layout according to your requirements. Country field has to be in this form and we will prefill it with JavaScript. Here is my form.

Set css class for parent column

Please, note that I defined Css Class for Country field. I will use it in JavaScript to hide the field if the form has been opened from the parent form.

Open JS-Editor and place the following js-code there:

var parentID = fd.getSourceID();
if (parentID) {
    fd.field('Country').control().value(parentID);
    $('.country-field').hide();
}

As you can see, to get ID of the parent form I used a new function fd.getSourceID(). If you open a new form from the parent form this function returns ID of the parent item and null otherwise.

Next, if parentID is not null, I assign it to Country and hide Country field by selecting it with Css Class defined above.

Now, when the user adds Offices from Country form they have to fill Title field only. Country field is filled automatically and is not displayed in the form.

Great. Now I would like to show related issues in Offices forms. So, users will see only those issues which are related to their office. I would also like to see two views: all active issues linked to the current office and issues linked to the current office and assigned to the current user. So, open Forms Designer and put two related items into separate tabs and configure them to get data from Issues list. Set filtering by Office field and select the appropriate view: Active Issues and Assigned To Me. Actually, you can create your own views with filtration, grouping and styling and choose them in Data Source Editor.

Set view of related items

Also, I modified the new form of Issues the same way as Offices to prefill and hide Office field if the form is opened from the parent form. Here is the result:

SharePoint form with list of related items

As you can see, with the new version of Forms Designer it's very easy to add related items anywhere in the form, filter them by lookup field and modify directly from the form. Do not hesitate to leave your questions we will be very glad to answer all of them.

Thursday, April 11, 2013

SharePoint 2013 form with related items list (part 2)

Note: This entry is outdated. The current version of Forms Designer contains 'Related Items' control which can be distributed anywhere in the form and quickly configured via its properties. Please, see our article about this new functionality. And of course, if you already have a license you can upgrade it to the latest version for free.

I have started a series of posts about creating forms with related items. In the previous post I described how to do that in a display form. Now I will demonstrate how to place related items into an edit form and edit them directly in it.

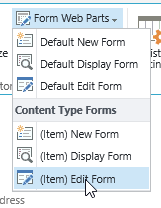
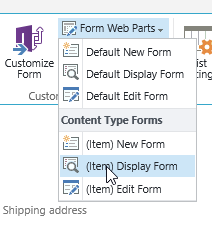
Like in the case of a display form, we have to place additional web part with the list of related items into an edit form . Navigate to the parent list, select List tab in the ribbon and select (Item) Edit Form in the drop down menu of the Form Web Part:

SharePoint Form Web Parts

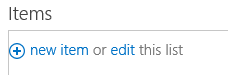
Click 'Add a Web Part' link at the top of a page and select related items list in the web parts dialog. You can see the following text at the top of the inserted list:

SharePoint 2013 Quick Edit

We have to disable in-place editing because if the user adds a new item in this mode they have manually fill order number. Here is the illustration:

SharePoint 2013 Quick Edit

So, we will remove in-place editing from this list and I will show how to fill order number automatically in the new form of a related item. Generally, I recommend you to minimize the number of ways of editing related items, because you can get stuck with many issues related to the ribbon, automatic redirection from the parent form and etc.

Now, let's remove in-place editing link. Save the form, go to the list of related items, open its settings page. Click Advanced Settings and disable Quick edit:

SharePoint 2013 Quick Edit

Return to the parent list and open its editing form in edit mode as we did above. As you can see there is only one link at the top of the related items: 'new item'. Great, now open properties of this web part and click 'Edit the current view' link. Like in the case of the display form, lets remove 'Product Name (linked to item with edit menu)' column from the view and replace it with 'Product Name (linked to item)'. Next, uncheck 'Allow individual item checkboxes' in the Tabular View section.

This way we disable the context menu and ribbon and leave an only way for editing items: user has to open them in a dialog window and remove or edit them from its ribbon.

Also remove 'OrderNum' column from the view, because there will be items related to the current order only. Like in the case of display form I have added total price into my view.

Save view and the edit form and go to Forms Designer. Select Edit Form, open JavaScript editor and past the same script like in the case of Display form:

var wp0 = $('div[id^="MSOZoneCell_WebPartWPQ"]:eq(0)');
wp0.detach().appendTo('#fd_tabcontrol-0-tab-4');
wp0.attr("onmouseup", "").attr("onkeyup", "");

I will not comment on it, you can find the description in the first post. Apart from this, we have to add the current order number into the 'new item' link of the list of related items to prefill it automatically in the new form of an item. Add the following JavaScript into editor:

var newItem = wp0.find('.ms-list-addnew a');
// getting query string hash
var queryString = SP.ScriptHelpers.getDocumentQueryPairs();
// adding get-parameter 'order' into new item link
newItem.attr('onclick', 'NewItem2(event, "' + newItem.attr('href') + '&order=' + queryString['ID'] + '"); return false;')

Save the form and close Forms Designer. Now open SharePoint Designer and add filtration to the related items by the current order as described for the Display form.

Finally, we have to modify a new item form to automatically fill 'OrderNum' column based on the provided get-parameter. Open the new form in the Form Designer, distribute fields in the form and open JavaScript editor. Paste the following code there:

// getting query string hash
var queryString = SP.ScriptHelpers.getDocumentQueryPairs();
// fill order number
fd.field('OrderNum').control().value(queryString['order']);

Now, when I click a 'new item' link from the Edit form of the order, the 'OrderNum' field is prefilled automatically with the current order number:

SharePoint edit form with list of related items

Tuesday, April 9, 2013

SharePoint 2013 form with related items list (part 1)

Note: This entry is outdated. The current version of Forms Designer contains 'Related Items' control which can be distributed anywhere in the form and quickly configured via its properties. Please, see our article about this new functionality. And of course, if you already have a license you can upgrade it to the latest version for free.

One of the usual cases of our customers is to create a form with related items, e. g. an order form with the list of items of the order. I will demonstrate how to place related items in the separate tab of the parent form and add or edit them directly in the current tab. I divided this manual into 3 parts:

  1. Display form
  2. Edit form
  3. New form

In this entry I will show how to create a display form with tabs and place related items into the separate tab. I created the list of orders and the list of order items with the following columns: Product Name (renamed Title), Weight, Width, Height, Depth, Quantity and Total price. I added lookup field OrderNum into the list of order items to link items with the order.

First, I designed forms of an order with Forms Designer, added tabs 'Customer', 'Billing Info', 'Shipping Info' and 'Items'. I will put related items in the 'Items' tab, which is now empty. Here is my form:

SharePoint form with tabs

Next, I changed the order items list setting to open forms in a dialog window. So users will be able to edit order items directly from the order form without leaving it. The described option is located here: List Settings -> Advanced settings -> Launch forms in a dialog

Now, go to the orders list and select List tab in the ribbon. Choose Form Web Parts drop down and select (Item) Display Form:

SharePoint form web parts

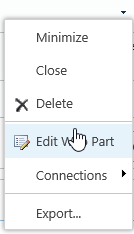
Click 'Add a Web Part' and select Order Items list. In the web part menu select 'Edit Web Part' item.

SharePoint edit web part

We will not allow users to edit the list of items in the display form of an order. So, first of all we have to disable links 'new item' and 'edit' on the top of the list. Change Toolbar Type to 'No Toolbar' in the settings window.

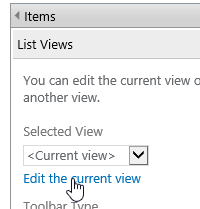
Next, click 'Edit the current view' link:

SharePoint edit current view

Here remove 'Product Name (linked to item with edit menu)' column from the view and replace it with Product Name (linked to item). Now users will not see an order item's context menu.

In the 'Totals' section I added the sum of Total Price to display it for the selected order. Ok, save the view. Next, we have to move the list of order items into the 'Items' tab and filter them by the current order.

Open Forms Designer editor for Orders list and select Display Form. Open JavaScript editor. The following JavaScript takes the first web part and replaces it into the fourth tab:

var wp0 = $('div[id^="MSOZoneCell_WebPartWPQ"]:eq(0)');
wp0.detach().appendTo('#fd_tabcontrol-0-tab-4');

When user clicks anywhere on the table of items, new tabs appear in the ribbon: Items and List. We have to disable this functionality to forbid users to edit the list of order items from a display form of an order. Paste the following row into JavaScript editor to disable mouse and keyboard events:

wp0.attr("onmouseup", "").attr("onkeyup", "");

Ok, save the display form, close Forms Designer and open any order in the display mode. Now you can see that the order items list appears in the 'Items' tab. The last thing we have to do is to filter this list by the current order. Open our display form in SharePoint Designer. Files generated with Forms Designer start with fd_{Content Type Name}_{Form Type}. So, my display form is called fd_Item_Display.aspx.

Find XsltListViewWebPart that renders Order Items list. Add a new binding parameter into ParameterBindings section:

<ParameterBinding Name="OrderId" Location="QueryString(ID)" DefaultValue="0"/>

Here we bound OrderId to get-parameter ID that contains the current order id value. You can find more info about parameter bindings here:
http://blogs.msdn.com/b/joshuag/archive/2009/04/06/dataformwebpart-parameters-and-parameterbindings.aspx

Now we can use 'OrderId' parameter in CAML-query:

<Where>
  <Eq>
    <FieldRef Name="OrderNum" LookupId="TRUE"/>
    <Value Type="Lookup">{OrderId}</Value>
  </Eq>
</Where>

'OrderNum' is an internal name of my lookup field. Place the code above into Query section and save the page.

Now on the display form of an order we can see order items related to the current order only. Here is my final display form:

SharePoint form with the list of related items

When users click on product name they see display form of an item in a dialog window:

SharePoint related item form