Sunday, December 22, 2013

Forms in multilingual sites of SharePoint 2010/2013

Today, I would like to demonstrate how to create absolutely unique forms for different languages in multilingual sites of SharePoint 2010/2013 with help of SharePoint Forms Designer 2.8.4 and higher.

As an example, I installed German language pack on SharePoint 2010 English and enabled it as alternate language for a site in its settings. Please, note, that absolutely the same steps are working for SharePoint 2013 on-premise as well:

SharePoint set alternate language

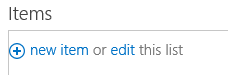
Now I create the list of issues and open Forms Designer to create English form first. As you can see titles of fields are displayed in English, because it is currently selected for me. Ok, here is my form:

SharePoint custom form for English

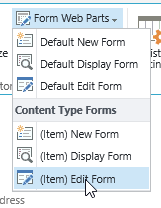
In the settings menu I change current language to German and open Forms Designer again:

SharePoint language selection menu

If you use SharePoint 2013 you will not find language menu in SharePoint UI, you have to change it in the browser settings: http://olafd.wordpress.com/2012/11/02/switch-language-in-sharepoint-2013/. In Internet Explorer open Internet Options and click Languages button. Here you can set the default language for your browser.

In the designed forms all texts and titles are left in English. I create a new group, let's name it 'German' and select User-defined rule tab. Since Forms Designer 2.8.4 version you can use CurrentLanguage token in rules. It contains the currently selected language code. You can find codes for different languages in the following page: http://msdn.microsoft.com/en-us/goglobal/bb964664.aspx. German code is 1031. Here is my rule:

CurrentLanguage = 1031

Ok, now I remove all fields and texts from my form for this group and as you can see, titles of all fields changed to German. Because of creating the separate group, I can design absolutely unique forms for German with additional notes and other set of fields. Here is an example of such form:

SharePoint custom form for German

Ok, let's test it. When I set English language in my browser or in SharePoint 2010 menu, I see the following form:

SharePoint English form

Since I change language to German, the same form has the following view:

SharePoint German form

Such approach with absolutely different forms for multiple languages is much better than SharePoint provides you out of the box. Without Forms Designer you can just change titles for your columns for different languages but the form itself will be the same. But as you know, length of the same texts in different languages can be much differ. So, if your form has a nice look for one language does not mean that it will not break for others. Moreover, often you have to display different sets of fields for different languages and Forms Designer is very suitable for this case.

Office 365

Since Forms Designer doesn't support groups functionality for Office 365, the only way to modify forms based on the current language is JavaScript. SharePoint has global variable _spPageContextInfo.currentLanguage which contains the current language code. So, you can replace titles, texts and visibility of any fields via Forms Designer JavaScript Framework based on the current language. Example:

if (_spPageContextInfo.currentLanguage == 1031) {
  // Replace titles of fields to German
  fd.field('Title').titleText('Titel');
  fd.field('AssignedTo').titleText('Zugewiesen an');
  …
  // Change title of the first tab:
  $('#fd_tabcontrol-0 > .ui-tabs-nav > li:eq(0) > a').html('Allgemein');

  // Change title of the second tab:
  $('#fd_tabcontrol-0 > .ui-tabs-nav > li:eq(1) > a').html('Anlagen');
}

Please, leave your questions in comments. Thank you.

Tuesday, December 3, 2013

Customization of toolbar buttons and item summary in SharePoint forms

Today I would like to present the new release of SharePoint Forms Designer 2.8.1 and demonstrate its main features. You can find the complete list of improvements on our website. In this article I will focus on customization of the bottom panel with buttons and the selected item info.

For my small demo I chose the list of workflow tasks in SharePoint 2013. By default, forms of this list contain additional buttons at the bottom and have the following view:

SharePoint Forms toolbar with additional buttons

When a user clicks Reject or Approve buttons, Task Outcome column is changed to the appropriate value and the task completes. Based on Task Outcome value workflow detects whether the approval is completed and continues or remains waiting for all the approvers’ decisions.

If we design an edit form with Forms Designer we will get two buttons only: 'Save' and 'Cancel'. To approve task a user will have to select Approved value in Task Outcome drop-down and save the current task. Now I will show, how to add new buttons 'Approve' and 'Reject' to the bottom of a form and define the same logic for them as they have in default forms.

Open Forms Designer, choose Workflow Task (SharePoint 2013) content type and Edit form type. You can find a new toggle button 'Buttons' in the ribbon. When it is checked you can redefine the standard toolbar: add or remove Save and Cancel buttons, append additional info into the summary section of the current item, etc. Check it and you will see the default toolbar at the bottom of your form:

Toolbar button in the ribbon

Default SharePoint form toolbar

Please, pay attention to the text:
Created at [Created] by [Author]
Last modified at [Modified] by [Editor]

Now you can use field values in Rich Text and Plain Text controls. For example, you can put the following text into your form: Hello, [Assigned To]. Please, complete this task by [Due Date]. The text in square brackets will be replaced with the appropriate field values of the current item.

Next, you see Save and Cancel buttons. Choose any of them and in the property grid you will find OnClick property. Here you can define JavaScript, which will be executed when user clicks the button. If you return false in your custom code the form will not be submitted, so, you can define additional validation (e.g. if field A is empty or has incorrect value), next, show an alert message and return false (stay on form).

We will now add Approve and Reject buttons. In the toolbox on the left side of Forms Designer window you can find additional controls Save and Close. They allow to put additional buttons with the same behavior as that of default Save and Cancel buttons. But you can define your custom code in OnClick property. So, I put two Save buttons next to the existing one and change their title to 'Approve' and 'Reject' via property grid:

Customize toolbar with SharePoint Forms Designer

Now, we have to define OnClick handler to set Task Outcome field and change Status to Completed. Please, pay attention that you can change fields via JavaScript only if they are on the form. So, you have to place them in your form but if you don't want to display them to your users you can hide them via CSS. I will demonstrate it below.

Here is the code for Approve button:

fd.field('TaskOutcome').value('Approved');
fd.field('Status').value('Completed');

And for Reject button:

fd.field('TaskOutcome').value('Rejected');
fd.field('Status').value('Completed');

Ok, now we can hide Task Outcome field. Users will change it via Approve and Reject buttons only. Select it in Forms Designer and set Style property on 'display: none'.

Here is my final form:

SharePoint form with custom toolbar

Please, leave your questions in the comments. Thank you.

Wednesday, October 2, 2013

How to open edit form right after creation of an item in SharePoint

In this article I would like to demonstrate how to open an edit form of an item right after its creation. This feature is very useful if you have related items filtered by the currently selected item on the form. As you may have noticed, you cannot edit related items on a new form because the parent item has not been created and its ID is not defined yet, so, other list items or documents cannot be linked to it.

Due to this issue, to create an item with connected child items users have to create a parent item first, save it and find it in the list, open its edit form and start editing the related items. Quite difficult, isn't it?

In SharePoint Forms Designer 2.7.11 we have implemented functionality that helps you to redirect users to any URL including edit form of an item right after its creation and inject ID of the currently created item into the link address.

Please note: this functionality works only in forms opened in full page, not in dialogs. In SharePoint 2013 all forms are opened in full page by default but in SharePoint 2010 you have to change this option in the following way: List Settings → Advanced Settings → Launch forms in a dialog. Set this option in 'No'.

Now, navigate to the list where you wish to configure redirection, open Forms Designer and choose a new form. Add the following JavaScript into JS-editor:

fd.onsubmit(function() {
  var uri = fd.setUrlParam(decodeURIComponent(window.location.href), 'FDRedirectWithID', 'fd_Item_Edit.aspx?ID=');
  fd.sourceFormParam(uri);
  return true;
});
As you can see, I used new JavaScript functions here:

setUrlParam(url, key, value)
Adds or updates query parameter in provided URL with a specified value and returns a new URL.
Url - source URL-string
Key - name of query string parameter
Value - new value of query parameter

sourceFormParam(value)
Gets or sets 'Source' query parameter of the URL which is contained in action attribute of the form. Source parameter contains URL of the page where users will be redirected after the submission of the form. If value is not specified the function returns the current value of 'Source' parameter.

In my example, users will be redirected after submission to the same page but with additional query parameter 'FDRedirectWithID'. If this query parameter is not empty Forms Designer gets its value, appends ID of the last item created by the current user and redirects to the generated URL. In my case, users will be redirected to 'fd_Item_Edit.aspx' form. You have to replace the name of the form with your own value. You can find it at the left bottom corner of Forms Designer.

SharePoint form name

If you have any questions, please, leave them here. Thank you.

Thursday, August 29, 2013

How to create forms with related items in SharePoint 2010/2013 including Office 365

In this article I am going to demonstrate a new control of SharePoint Forms Designer called Related Items which has become available in version 2.7.5.

In the previous entries (1, 2) I described how to create forms with related items but that method requires much configuration including modification via SharePoint Designer. So users have to possess base skills in SharePoint configuration to follow instructions from those articles.

We looked into our customers requests and added a new control that allows to add and configure a list of related items directly in Forms Designer without using SharePoint Designer or configuration of web parts.

First, I have created lists linked by a single lookup column. Here you can use the standard lookup or our Cross-site Lookup column. Related items control works with both of them. Here are my lists:

  • Countries;
  • Offices: contains Country lookup column linked with Countries list;
  • Issues: contains Country and Office lookup columns linked with Countries and Offices lists accordingly;

In the Issues forms I configured cascading between Country and Office drop-downs. So, users can create issues and attach them to the specific office by selecting Country first and then Office.

Now I would like to place the list of Offices into Country form and filter it by the current Country. Also, it would be very useful to edit Offices list directly from the Country form.

Open Countries edit form in Forms Designer. You can find the new control 'Related Items' on the left side. I put it into the accordion section:

Related Items Control in SharePoint Forms Designer

In the properties window you can find Data Source property. Expand it by clicking the dots button. Here you can specify the list that you wish to display in your form, its view and lookup column for filtering. To display offices related to the current country I setup the following configuration:

Data Source Editor of Related Items control

Next, I will describe other properties of Related Items control.

Editable
If value is True, the related list is displayed with Add new button and a context menu for the items. So you can modify the list directly from the current form. It is good practice to set this property False for display forms and True for edit forms.

Save option If value is Recreate, the web part with the related items is resaved each time the form is saved. So if you wish to modify Related items with SharePoint Designer, you can change the value of Save option property to IgnoreIfExists, and Forms Designer will not resave Related Items component in the case it already exists on the form page even if you modified its properties.

View This is an extended property for advanced users. Here you can modify schema of related items view.

Ok, now let's see what we get:

SharePoint form with related items

Now, users can edit Offices directly in Country form. When the user clicks 'new item' they see Office form which contains Country lookup column:

SharePoint new form

Ok, now I wish to fill Country field in the new Office form automatically based on the parent form. Open this form in Forms Designer and configure its layout according to your requirements. Country field has to be in this form and we will prefill it with JavaScript. Here is my form.

Set css class for parent column

Please, note that I defined Css Class for Country field. I will use it in JavaScript to hide the field if the form has been opened from the parent form.

Open JS-Editor and place the following js-code there:

var parentID = fd.getSourceID();
if (parentID) {
    fd.field('Country').control().value(parentID);
    $('.country-field').hide();
}

As you can see, to get ID of the parent form I used a new function fd.getSourceID(). If you open a new form from the parent form this function returns ID of the parent item and null otherwise.

Next, if parentID is not null, I assign it to Country and hide Country field by selecting it with Css Class defined above.

Now, when the user adds Offices from Country form they have to fill Title field only. Country field is filled automatically and is not displayed in the form.

Great. Now I would like to show related issues in Offices forms. So, users will see only those issues which are related to their office. I would also like to see two views: all active issues linked to the current office and issues linked to the current office and assigned to the current user. So, open Forms Designer and put two related items into separate tabs and configure them to get data from Issues list. Set filtering by Office field and select the appropriate view: Active Issues and Assigned To Me. Actually, you can create your own views with filtration, grouping and styling and choose them in Data Source Editor.

Set view of related items

Also, I modified the new form of Issues the same way as Offices to prefill and hide Office field if the form is opened from the parent form. Here is the result:

SharePoint form with list of related items

As you can see, with the new version of Forms Designer it's very easy to add related items anywhere in the form, filter them by lookup field and modify directly from the form. Do not hesitate to leave your questions we will be very glad to answer all of them.

Thursday, August 1, 2013

SharePoint print forms

In this article I will demonstrate how to create a print form with SharePoint Forms Designer. I will use version 2.7.3 in which link and button controls became available as well as additional JavaScript functions for switching between forms.

My display form is designed with accordion and has the following view:

SharePoint form with accordion

But I would like to have another form for printing where all fields are visible and located one by one. To achieve this purpose I will create a completely different display form just for printing and put the link to navigate it from the default display form.

First, I opened Forms Designer and added a new group of forms:

SharePoint Forms Designer groups

I called it Print and defined the rule as 'false'. It means that the form will not be shown by default. Validate → Ok.

SharePoint Forms Designer user-defined rules

Next, I switched to the display form and designed it without accordion. I just put fields one by one and divided them with headers. I put link 'PRINT' at the top of this form and set its OnClick option in:

window.print(); return false;
SharePoint design print form

You can define any JavaScript in OnClick option of button and hyperlink controls. This script is executed when the user clicks the link or button. In our case the current page will be printed when the user clicks 'PRINT' link. Now we have to place link in our default display form with accordion that will open our display form for printing.

I copied the filename of my print form into clipboard. You can find it in the left bottom corner of Forms Designer window:

SharePoint Forms Designer form filename

Next, I switched to 'AllUsers' display form and put 'PRINT FORM' link at the top of it. In OnClick option I put the following script:

return fd.openFormInDialog('fd_Contact_ad98a766-7fd1-499d-a492-36a0826d285e_Display.aspx');

Function openFormInDialog() of Forms Designer's JS-Framework opens the specified form in a dialog. It was added in the version 2.7.3. There were added several other useful functions: openForm() that opens the specified form in the current window and backToPrevForm() that redirects to the previously opened form. For example, if you wish to open a print form in the current window, not a dialog, you can use openForm() function in the default form and put 'Back' link that calls backToPrevForm() function to the print form to allow users to return back to the default display form.

Ok, now when user clicks 'PRINT LINK' they will see a dialog with the print form. They can click 'PRINT' link to print it:

SharePoint forms for printing

Office 365

The example above works perfectly for SharePoint 2010/2013 on-premises. But currently Forms Designer for SharePoint Online in Office 365 does not support groups functionality. Here I will show you a workaround.

First, we have to design the display form for printing as described above. When it is ready, save it and open the current list in SharePoint Designer. Here you can find forms designed with Forms Designer, they contains 'fd_' prefix:

SharePoint form files

Rename your display form to PrintForms.aspx. Now, open Forms Designer and create the default display form. Put 'PRINT LINK' into it and pass 'PrintForm.aspx' into fd.openFormInDialog() function. Now you have two completely different forms for viewing and printing in Office 365.

Wednesday, July 10, 2013

Cascading drop-downs with Cross-site Lookup For SharePoint 2013 and Office 365

In the previous entries I showed how to configure Cross-site Lookup column and how to modify the template of the lookup result set. Now I'm going to demonstrate how to use Cross-site Lookup with Forms Designer and build dependent columns and cascading dropdown in particular with this complex solution. Please, note, Cross-site Lookup is supported by Forms Designer starting from version 2.6.4930.

Let's imagine that our company has offices in multiple countries and we have to create a ticket system. In the ticket form users have to specify their office. In order to simplify this task we can also add a country field to the ticket form. So, when the user chooses a country in the form the dropdown of offices is automatically filtered by the selected country. This behavior is called cascading dropdowns.

Ok, I will use lists from my previous articles: Countries and Target. I added a new list called Offices to the same site where Countries list is located. Then I created a simple lookup field in Offices and set Countries as its source list. So, now we can specify the country for each office. Here is a new Office form:

SharePoint 2013 lookup

Let's imagine that our Target list is the list of tickets from my previous example. We have already created Cross-site Lookup column for country in Target list. Now we have to create Office lookup field that is linked to Offices list. The both lookups do not allow multiple values. Now we have to use Forms Designer to place both of these fields into the form. Forms Designer is required in this scenario because we will use its JavaScript framework.

Here is a new Target form:

SharePoint 2013 cascading lookups

Now let's open Cross-site Lookup management window and select Office field there. Expand Additional settings. Here we have to modify 'Request items' template to load only those offices which belong to the selected country. Here is my template:

function (term, page) {
  // Getting the selected country
  var countryId = fd.field('Country').value();
  if (!countryId) {
    countryId = 0;
  }
  
  // Filtering by the selected country
  if (!term || term.length == 0) {
    return "{WebUrl}/_api/web/lists('{ListId}')/items?$select=Id,{LookupField},Country/Id&$orderby=Created desc&$expand=Country/Id&$filter=Country/Id eq " + countryId + "&$top=10";
  }
  return "{WebUrl}/_api/web/lists('{ListId}')/items?$select=Id,{LookupField},Country/Id&$orderby={LookupField}&$expand=Country/Id&$filter=startswith({LookupField}, '" + term + "') and Country/Id eq " + countryId + "&$top=10";
}

First I get the selected country field with Forms Designer's JavaScript framework. Then I use it in requests as additional filter. Pay attention to the requests. Firstly, to use a field in the filter you have to add it into the select part of the query. Secondly, if you use lookup column in the filter you have to use required $expand operator. You can find detailed info on using lookup column in SharePoint 2013 REST API in the following article: http://www.andrewconnell.com/blog/Applying-Filters-to-Lookup-Fields-with-the-SP2013-REST-API

Now, when we choose a country in the form, the drop down list of offices is automatically filtered by the selected country:

Cascading lookups in SharePoint 2013 and Office 365

The last thing we have to do is to clear Office field when Country is changed. Open Forms Designer and go to its JS-editor. Put the following code there and save the layout for edit and new forms:

fd.field('Country').change(function() {
  fd.field('Office').value(0);
});

As you can see Forms Designer's JavaScript framework supports Cross-site Lookup field like any standard field. So, you can dynamically get and set values, handle value changing events, make selection controls readonly and etc.

Setting up the view of results in Cross-site Lookup column for SharePoint 2013 and Office 365

In the previous entry I demonstrated how to create Cross-site Lookup Columns. Now I will show how to use Advanced section fields of Cross-site Lookup column management dialog and how to modify the template of the result set in particular. With our Cross-site Lookup you can add extra fields to the result set to simplify search and navigation through the large lists. Here is illustration from the official website:

SharePoint 2013 cross-site lookup people with photos

I will use the same environment that I created in the previous entry: Countries list in the root site of the root site collection and Target list in the nested site collection.

Here I will show how to place the flag near the country name in the lookup result set. First, I added Hyperlink or Picture column and called it Flag. Next, I set flags for all the countries in my list:

SharePoint 2013 cross-site lookup: list of countries with flags

Now, go to Target list and open Cross-site lookup management window. Select Country field and expand Advanced settings at the bottom of the dialog.

Here you can find two templates. The first one 'Request items' is used to request items from the source list through SharePoint 2013 rest service. Here we can define sorting, additional filtering and searching criteria for result sets. We have to insert our Flag column into select statement to retrieve it from the server and build it into the item template which is used in the result set.

Here is my 'Request Items' template:

function (term, page) {
  if (!term || term.length == 0) {
    return "{WebUrl}/_api/web/lists('{ListId}')/items?$select=Id,{LookupField},Flag&$orderby=Created desc&$top=10";
  }
  return "{WebUrl}/_api/web/lists('{ListId}')/items?$select=Id,{LookupField},Flag&$orderby={LookupField}&$filter=startswith({LookupField}, '" + term + "')&$top=10";
}

The second template 'Item format' defines the view of an item in the result set. Here we will use our Flag field that will be returned from the server by the request defined in the first template. Here is my 'Item format' template:

function(item) {
  return '
' + item["{LookupField}"] + '
'; }

Now let's see what our Country field looks like in the forms:

SharePoint 2013 cross-site lookup with extended results

Excellent! In the following article I will show how to use Cross-site Lookup with Forms Designer and create dependent columns including cascading dropdowns.

Cross-site Lookup column for SharePoint 2013 and SharePoint Online in Office 365

In this article I would like to present our new solution Cross-site Lookup for SharePoint 2013 and SharePoint Online in Office 365. With help of this feature you can create lookup columns with quick search and asynchronous loading of results for lists and libraries to link data from any sites within a site collection.

First, I would like to cover the technical aspects of this solution. Our lookup is not a custom field because custom fields can be deployed only as part of farm solutions which are not available for Office 365. So, we made it as a number of JavaScript templates (view, edit, new and display) for standard Lookup field. We used JSLink property of SPField class to inject these templates and Select2 control with some modifications as control for searching and navigating through the source list.

Now I will demonstrate our solution in action. In the root web of the root site collection I created a list of countries. Next I created a new site collection in the same web application and added a custom list to its root site and named it Target. Ok, let's create a new lookup column in Target list which links to Countries list in the root site collection.

Open the view of Target list and click 'Plumsail Lookup ' button in 'List' tab of the ribbon.

SharePoint 2013 Cross-site Lookup

If you don't have the existing lookup column in your list you will see a dialog for creating a new lookup field. Enter the name of this field in text box and click Ok.

Create cross-site lookup in SharePoint 2013

After the field has been successfully added you can configure it. First, let's change the source list. Click 'Change ' link near the web url to specify the web of your source link. I clear this field because my source list is located in the root site of the root site collection. Ok.

Now select the source list in the next dropdown and the field of the source list which will be shown in the target list. In my case the source list is Countries and the field is Title. Ok.

Cross-site lookup column for SharePoint 2013 settings

By checking appropriate options you can enable multiple values for your lookup and add 'New Item' link which allows users to add new items to the source list directly from the form.

If you check Add 'New Item' link you will see the following options:

SharePoint 2013 lookup with add new item link option

In the first field you can specify the title of the new item link. The second one is for default content type ID. When the user clicks the new item link they will see a form for the specified content type. If you leave this field empty, users will see a form for the default content type of the source list.

Here is what this link looks like in the form:

SharePoint 2013 lookup with add new item link

I will cover Advanced section fields in the next article. Now, let's see what our lookup field looks like in forms and list views.

Lookup column with a single value:

SharePoint 2013 lookup with single value

Lookup column with multiple values:

SharePoint 2013 cross-site lookup with multiple values

List view:

SharePoint 2013 cross-site lookup in the list view

Display form:

SharePoint 2013 cross-site lookup in display form

Looks perfect. In the next articles I will demonstrate how to change the template of the result set in the select box of Cross-site Lookup Column, how to use Lookup and Forms Designer together and create dependent columns and cascading dropdowns.

Friday, May 3, 2013

Reservation of resources in SharePoint 2013 and SharePoint 2013 Online in Office 365

SharePoint 2010

I suppose, many of you know about a great calendar feature in SharePoint 2010 called resource reservation. It enables organization of meetings in useful interface that allows to select multiple resources such as meeting rooms, projector and other facilities and required participants, and next the time frame that is free for all participants and facilities in the calendar view. You can switch between week and day views. Here is a screenshot of the calendar with resource reservation and member scheduling features:

Meeting organizer in SharePoint 2010

You can change resources and participants in the form of your meeting, find free time frames in the diagram and check double booking:

Create meeting in SharePoint 2010

There are two ways to add the resource reservation feature into SharePoint 2010 calendar:

  1. Enable web feature 'Group Work Lists', add calendar and go to its settings. Click 'Title, description and navigation' link in 'General settings' section. Here check 'Use this calendar to share member's schedule?' and 'Use this calendar for Resource Reservation?'
  2. Create a site based on 'Group Work Site' template.

Here is the detailed instructions: http://office.microsoft.com/en-us/sharepoint-server-help/enable-reservation-of-resources-in-a-calendar-HA101810595.aspx

SharePoint 2013 on-premise

After migration to SharePoint 2013 I discovered that these features were excluded from the new platform and saved only as backward compatibility. So, you can migrate your application with installed booking calendar from SharePoint 2010 to SharePoint 2013 and you will keep functionality of resource reservation but you cannot activate it on a new SharePoint 2013 application through default interface.

Microsoft officially explained these restrictions by unpopularity of the resource reservation feature: http://technet.microsoft.com/en-us/library/ff607742(v=office.15).aspx#section1

First, I found a solution for SharePoint 2013 on-premise. It is possible to display the missing site templates including 'Group Work Site'. Then you just need to create a site based on this template and you will get the calendar of resources.

Go to C:\Program Files\Common Files\Microsoft Shared\Web Server Extensions\15\TEMPLATE\1033\XML, open WEBTEMP.XML file, find an element with 'Group Work Site' title attribute and change its Hidden attribute from FALSE to TRUE.

SharePoint 2013 Online in Office 365

Perfect, now we can use free SharePoint booking system based on the standard calendar. But what about SharePoint Online in Office 365? We do not have an access to WEBTEMP.XML in its file system.

After some research I developed a sandbox solution that enables hidden 'Group Work Lists' feature and adds calendar with resource reservation and member scheduling features. Please, download it and follow the instructions to install:

  1. Go to the site collection settings.
  2. Open 'Solutions' area from 'Web Designer Galleries' section.
  3. Upload CalendarWithResources.wsp package and activate it.
  4. Now, navigate into the site where you wish to add the calendar with the enabled resource reservation feature.
  5. Open site settings -> site features.
  6. Activate 'Calendar With Resources' feature.

Great, now you have Group Calendar with an ability to book resources and schedule meetings. This solution works for SharePoint 2013 on-premise as well, so you can use it instead of WEBTEMP.XML file modification.

Meeting organizer in SharePoint 2013

The form of the meeting:

Create meeting in SharePoint 2013

How it works

I have attached source project to this entry. CalendarWithResources feature is dependent on feature with GUID: 9c03e124-eef7-4dc6-b5eb-86ccd207cb87. This is 'Group Work Lists' web feature that exists for backward compatibility but is hidden from the list of features. So, it is the only way to enable it.

Also solution contains a calendar list with a custom schema. I added EnableResourceSelector="TRUE" and EnablePeopleSelector="TRUE" attributes into the definition. These properties turn on the resource reservation and member scheduling settings of the calendar.

Links:

CalendarWithResources.wsp
Sources of CalendarWithResources

Thursday, April 11, 2013

SharePoint 2013 form with related items list (part 2)

Note: This entry is outdated. The current version of Forms Designer contains 'Related Items' control which can be distributed anywhere in the form and quickly configured via its properties. Please, see our article about this new functionality. And of course, if you already have a license you can upgrade it to the latest version for free.

I have started a series of posts about creating forms with related items. In the previous post I described how to do that in a display form. Now I will demonstrate how to place related items into an edit form and edit them directly in it.

Like in the case of a display form, we have to place additional web part with the list of related items into an edit form . Navigate to the parent list, select List tab in the ribbon and select (Item) Edit Form in the drop down menu of the Form Web Part:

SharePoint Form Web Parts

Click 'Add a Web Part' link at the top of a page and select related items list in the web parts dialog. You can see the following text at the top of the inserted list:

SharePoint 2013 Quick Edit

We have to disable in-place editing because if the user adds a new item in this mode they have manually fill order number. Here is the illustration:

SharePoint 2013 Quick Edit

So, we will remove in-place editing from this list and I will show how to fill order number automatically in the new form of a related item. Generally, I recommend you to minimize the number of ways of editing related items, because you can get stuck with many issues related to the ribbon, automatic redirection from the parent form and etc.

Now, let's remove in-place editing link. Save the form, go to the list of related items, open its settings page. Click Advanced Settings and disable Quick edit:

SharePoint 2013 Quick Edit

Return to the parent list and open its editing form in edit mode as we did above. As you can see there is only one link at the top of the related items: 'new item'. Great, now open properties of this web part and click 'Edit the current view' link. Like in the case of the display form, lets remove 'Product Name (linked to item with edit menu)' column from the view and replace it with 'Product Name (linked to item)'. Next, uncheck 'Allow individual item checkboxes' in the Tabular View section.

This way we disable the context menu and ribbon and leave an only way for editing items: user has to open them in a dialog window and remove or edit them from its ribbon.

Also remove 'OrderNum' column from the view, because there will be items related to the current order only. Like in the case of display form I have added total price into my view.

Save view and the edit form and go to Forms Designer. Select Edit Form, open JavaScript editor and past the same script like in the case of Display form:

var wp0 = $('div[id^="MSOZoneCell_WebPartWPQ"]:eq(0)');
wp0.detach().appendTo('#fd_tabcontrol-0-tab-4');
wp0.attr("onmouseup", "").attr("onkeyup", "");

I will not comment on it, you can find the description in the first post. Apart from this, we have to add the current order number into the 'new item' link of the list of related items to prefill it automatically in the new form of an item. Add the following JavaScript into editor:

var newItem = wp0.find('.ms-list-addnew a');
// getting query string hash
var queryString = SP.ScriptHelpers.getDocumentQueryPairs();
// adding get-parameter 'order' into new item link
newItem.attr('onclick', 'NewItem2(event, "' + newItem.attr('href') + '&order=' + queryString['ID'] + '"); return false;')

Save the form and close Forms Designer. Now open SharePoint Designer and add filtration to the related items by the current order as described for the Display form.

Finally, we have to modify a new item form to automatically fill 'OrderNum' column based on the provided get-parameter. Open the new form in the Form Designer, distribute fields in the form and open JavaScript editor. Paste the following code there:

// getting query string hash
var queryString = SP.ScriptHelpers.getDocumentQueryPairs();
// fill order number
fd.field('OrderNum').control().value(queryString['order']);

Now, when I click a 'new item' link from the Edit form of the order, the 'OrderNum' field is prefilled automatically with the current order number:

SharePoint edit form with list of related items